Shedworx’ VoltaicHD app to add native preview / edit features

The Shedworx guys are always busy working away on improving their applications (VoltaicHD, FlamingoHD, RevolverHD) for working with AVCHD video. In a recent blog post on their site they highlighted the fact that Mac OSX 10.6 Snow Leopard doesn’t bring any changes in support for the AVCHD video format, basically OSX 10.6 still can’t natively open or edit AVCHD video so it needs to be converted in order to be edited within apps such as iMovie or Final Cut Pro.

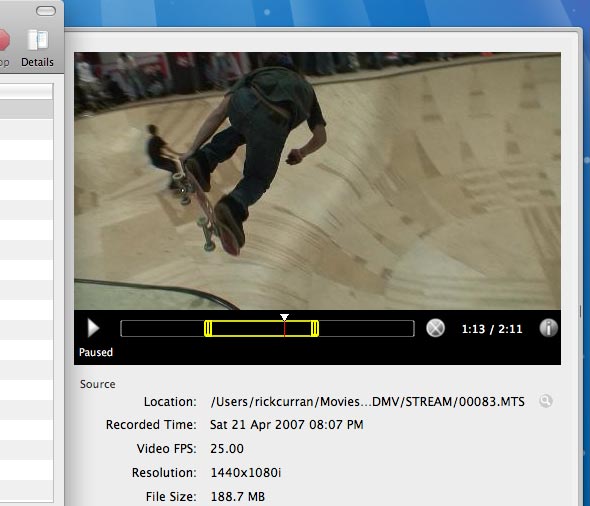
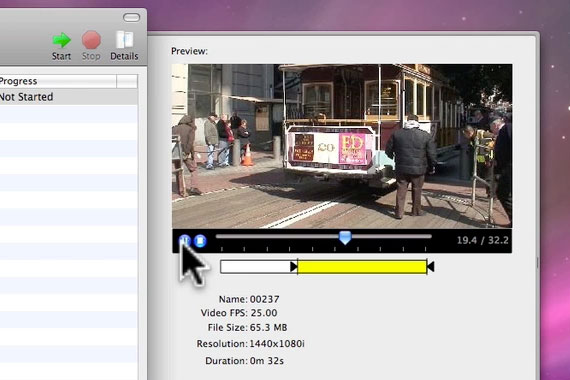
This lack of native support has encouraged the Shedworx guys to bring some simple trimming and editing features into version 2 of VoltaicHD which will hopefully be out in October. This will be a really handy feature as it will allow some very quick editing of files without the need for conversion. It will be especially useful if you just want to grab a small section of a clip and convert that for editing in iMovie or Final Cut instead of having to convert the entire clip.

So far they’ve got basic trimming features working and have published a demo movie showing how it works, all in all it’s looking to make VoltaicHD an even handier application!

Update – VoltaicHD 2 released in October 2009

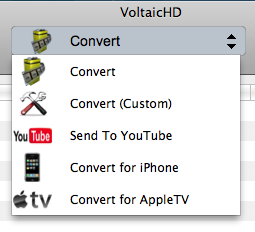
Shedworx have released version 2 of VoltaicHD adding new features such as preview of AVCHD / AVCHD Lite clips, native editing of AVCHD video and the ability to upload video to YouTube. I’ve written a post with an overview of VoltaicHD 2.

Post-install notes of Mac OSX 10.6 Snow Leopard

I thought I’d compile a few notes / points of interest of things I’ve noticed after installing Mac OSX 10.6 Snow Leopard on my development Mac. I’m going to keep updating this page and adding things to it as I come across them.

I use the default install of Apache & PHP and install MySQL from the installer from MySQL.com, I guess I should custom build and install these but it’s easy enough to work with the defaults anyway.

PHP under Snow Leopard

PHP under Mac OSX 10.6 Snow Leopard is version 5.3.0 and thankfully has the GD libraries enabled by default. Especially good for WordPress installs so that it can do image resizing for thumbnails etc.

I noticed I was getting an error relating to timezones on many of my sites, along the lines of:

Warning: strtotime() [function.strtotime]: It is not safe to rely on the system’s timezone settings. You are *required* to use the date.timezone setting or the date_default_timezone_set() function.

The solution I used to this was just to restore the previous php.ini file, this showed in the /etc directory as ‘php.ini.default-5.2-previous’. Just rename it to ‘php.ini’ (replacing any existing php.ini file if it exists, it didn’t for me). You’ll then want to edit php.ini and look for the ‘date.timezone’ setting and put in your timezone info (PHP.net timezone page) and then restart Apache. Hopefully it should be fine after that.

I also started getting a lot of warnings on some of my development sites along the lines of:

PHP Deprecated: Assigning the return value of new by reference is deprecated in…

These are warnings about old deprecated PHP4 era code, recent versions of PHP5 enable these warnings, but you can switch these off by adding an additional error reporting element to your php.ini file in the error handling section:

error_reporting = E_ALL & ~E_DEPRECATED & ~E_NOTICE

Just add the E_DEPRECATED part and then restart Apache and the warnings should be gone.

Apache

The version of Apache is 2.2.11, the latest available from Apache.org is 2.2.13 so it’s fairly up to date. If you think this is an issue then check out the release notes for 2.2.13.

MySQL

MySQL isn’t installed by default in Snow Leopard so you need to install it yourself. I simply downloaded the latest 64 bit Intel version from MySQL.com, they only show version for Mac OS 10.5 at the moment but it worked fine for me. The installer provides a startup item to make MySQL run at boot time and also a System Preference to control it, it’s worth noting that this is only 32 bit so it will make System Preferences restart itself into 32 bit mode, not a big deal though.

Booting 64 bit

There’s been a fair bit of discussion about Snow Leopard and it being 64 bit. By default Snow Leopard boots into 32 bit mode, however this doesn’t make that big a difference as 64 bit apps will run in 64 bit and access all the memory available on your system. One thing to note though is that the original unibody MacBook (which I have!) can’t startup in 64 bit mode, I’m not sure if that’s a big deal or not though really.

If you want to get into a really in depth examination of Snow Leopard’s 64 bit capabilities then check out John Siracusa of Ars Technica’s comprehensive review, beware though, it’s a lengthy read but it’s a great overview of the new technologies that are under the surface in Mac OSX 10.6.

Flash plugin out of date

The Flash plugin needs updated as the version that comes in Snow Leopard is an old version (10.0.23.1) which has some security vulnerabilities, just go to http://www.adobe.com/go/getflashplayer and download the latest version. There’s been quite a bit of coverage of this online, the gist of it is summed up in this post over on Daring Fireball. Basically the most up to date version of the Flash plugin was probably released after Snow Leopard’s final release version’s features were frozen, so basically Snow Leopard overwrites the newer version with an older version upon install.

It’s easily fixed by downloading the latest version, although I don’t know why Adobe don’t make the autoupdate feature of the Flash plugin a bit more aggressive. I can’t think of the last time I saw any prompts to update it, you can actually adjust the autoupdate settings via the Flash Player Settings Manager page on the Adobe website (which you probably never knew existed!).

Quick Look from Print progress dialog

I’m not totally sure this is a new feature to Snow Leopard, I may just have never noticed it before! If you hit space or double-click on a print job in the print progress you get a Quick Look preview of your document, even if it’s not new it’s quite a handy feature!

That’s my thoughts / experiences so far, I’ll add more to it as I come across things of interest. Anybody noticed any other new features / issues? Drop a comment if you want and I’ll maybe add it to the notes.

~~~~~


Outlook comes to Mac, will it make Microsoft ‘Fix Outlook’?

Microsoft’s Mac Office team recently announced that the next version of Mac Office 2010 will replace the Entourage email client with a purpose-built for Mac version of Outlook. This is interesting as it suggests that Microsoft see the forthcoming Exchange support built into Mac OSX 10.6 as bit of a threat.

The current email client in Mac Office, Entourage, is a poor citizen of OSX 10.5 due to its single database that is not very compatible with OSX 10.5’s Time Machine back up function. So Entourage was at least due for an update, however, bringing Outlook to Mac at least makes things a bit more consistent between Windows and Mac Office suites. I dare say a number of Windows to Mac switchers will be quite happy to see the addition of Outlook.

Will Outlook for Mac’s HTML email support suck like it does on Windows?

With the announcement I think many web designer / developers might likely have the above question in mind! If you’re not in the habit of creating HTML format emails then you may not understand what the problem is, basically since the release of Office 2007 for Windows the rendering of HTML emails in Outlook took a turn for the worse. Outlook 2007 uses Word’s HTML rendering engine to display HTML emails, effectively taking several steps backward in regards to rendering support in modern email clients.

Due to the poor HTML support in Outlook on Windows, developing HTML email newsletters requires using HTML formatting that hasn’t seen the light of day since the heady days of the late 90’s, table based markup, very little support for CSS markup. If you want to read more about this then head over to the Email Standards Project for lots of good information, and in particular this post: “Microsoft to ignore web standards in Outlook 2010 – enough is enough”.

The Mac Office team have indicated they will make Outlook for Mac from the ground up as a true Mac application:

Outlook for Mac is being built from the ground up as a Mac OS X application using Cocoa. It will have a new database that delivers a reliable, high performance, and integrated experience with Mac OS X. Users will be able to back-up with Time Machine and search email, calendar and contacts with Spotlight.

So I’m reading from this that as it’s using Apple’s Cocoa frameworks that it will make use of the WebKit rendering that Cocoa provides to render HTML emails. As such it should have excellent HTML rendering capabilities, which incidentally the current Entourage application already has. So Mac users should have a good experience regardless of whether they use Apple’s Mail or Outlook email clients.

However, there’s a potential problem. The Windows Outlook team have so far stubbornly denied any need to fix the problem with HTML rendering in Outlook on Windows and indeed seem intent to release Outlook 2010 with the exact same rendering support. As the Outlook team seem to think that the Word HTML rendering engine is appropriate, will they mandate that Mac Outlook should render emails exactly the same way that the Outlook for Windows does? Will they make Word the rendering engine for HTML emails in Outlook for Mac?

If they don’t then basically they’ll have a potential lack of interoperability between Outlook on the different platforms, Outlook for Mac will offer good support for HTML email (as it already does with Entourage), and Outlook for Windows will suck. I’m not sure that Microsoft will be happy with that seeing as Office is one of their flagship products and will want to make the experience the same. The question is, if that is the case then which side will yield?

Email Standards are Web Standards

Regardless of your opinion on HTML emails* it’s a big issue, whether you like or dislike HTML format emails the reality is that they’re here to stay, support for web standards and good layout practices should be encouraged, regardless of whether that HTML is rendered in an email client or a web browser. The recent Fix Outlook campaign hopefully sent a strong message to Microsoft about how the development community feel about it. Let’s hope Outlook for Mac doesn’t come with the same support as it’s Windows counterpart and that the discrepancy between their rendering engines forces Microsoft to step up and make Outlook 2010 for Windows include improved support instead of dumbing down Outlook for Mac!

Update:
There’s a new site launched by a couple of employees from Microsoft, “Make Office Better”, it introduces it’s purpose stating:

Hi! We’re two Microsoft employees looking to collect customer ideas on how to improve Microsoft Office. If you’ve got a new feature idea or an idea on how to improve Microsoft Office, please share it here…and vote on other ideas you agree with. Through the magic of crowd-sourcing the best ideas should rise to the top.

What’s great about the ‘magic of crowd-sourcing’ in this case is that the number 1 Office issue that people want to see fixed is “Improve the HTML support in Outlook“. Well, they asked for feedback!

~

* And don’t say “HTML emails suck, everyone should just use plain text emails”, HTML emails will stop being used around the same time that everyone adopts XHTML 2. If you don’t like them then you can always use a mail client that can force the display in plain text!

How to fix flashing background images in Internet Explorer 6

In the process of using jQuery on a website revamp I encountered a problem I’ve experienced once before – flashing background images when using jQuery hovers in IE6. It turns out the problem is that IE6 does not cache images properly.

If you’re a web developer then you have probably set IE6’s Internet Options to check for newer version of stored pages every time you visit it in order to see all the incremental changes you make during testing / debugging. If that’s the case then you’re very likely to encounter the IE 6 flashing background problem. A typical situation would be using jQuery hover code on an element with a background image specified in the CSS. In this situation you may find that each time you hover over an element the image is reloaded resulting in a flashing effect in IE6.

One solution to this problem is to change the default of ‘automatically’, however, you have no way of knowing if the end users of your site will have the same settings so it’s possible they experience the same issue.

Upon hitting this issue recently I endeavoured to find a solution rather than adapting my HTML / CSS to fix it as I have done in the past. I also knew that IE6 users would be reasonably common for my client ‘s potential website user base so it needed fixed one way or the other. A bit of googling came up with an article entitled “Dear IE6: Please Cache my Images.“, the article’s solution was a bit of jQuery code that makes use of a specific IE javascript command to force background images to stay cached regardless of settings used in Internet Options:

if(jQuery.browser.msie && parseInt(jQuery.browser.version, 10) == 6) {   try {     document.execCommand("BackgroundImageCache", false, true);   } catch(err) {} }

Add this code to your page and it will fix the flashing image issue with hovers in IE6! Quite a simple solution to an annoying problem that has previously caused me to change my HTML code to fix, I’m glad that I decided to Google a solution this time!

One other thing to keep in mind that is pointed out in the aforementioned article is that this script will enable the caching in IE6 until you quit the browser and restart it so it will affect all sites that you visit in IE6.

Adobe BrowserLab – Hosted Browser testing from Adobe

BrowserLab logoAdobe have added a lot of new projects to their Labs page over at http://labs.adobe.com since I’d last checked it out. In particular there’s a new service / product called BrowserLab that allows you to test web pages in various browsers along the lines of Litmus, Browsershots or Netrenderer. Adobe describe BrowserLab as:

BrowserLab provides web designers exact renderings of their web pages in multiple browsers and operating systems, on demand. BrowserLab is a powerful solution for cross-browser compatibility testing, featuring multiple viewing and comparison tools, as well as customizable preferences. Since BrowserLab is an online service, it can be accessed from virtually any computer connected to the web. Also, Adobe Dreamweaver® CS4 software users have access to additional functionality such as testing local and active content.

This service / app has been in development for some time, Adobe actually showed a sneak peak of it back in November at their Max Conference under the code name ‘Meer Meer‘. So although this might seem like Adobe playing catchup with Microsoft’s recent ‘SuperPreview‘ release it’s actually nothing of the sort. If you compare BrowserLab with SuperPreview you’ll see that they’re quite different apps – primarily that SuperPreview is a Windows app that only let’s you preview IE6 and either IE7 or 8 depending on which is installed – and of course requires you to be running on Windows to use it whereas BrowserLab is a browser based application that simply requires the Flash plugin and therefore works on both Windows, Mac and Linux.

Browser and OS versions currently supported in BrowserLab at this time are:

  • Firefox 2.X and 3.X (Windows XP and Mac OS X)
  • Internet Explorer 6.X and 7.X (Windows XP)
  • Safari 3.X (Mac OS X)

So a good range of browsers are covered, although IE8 really needs to be there along with Opera as well to really cover all the main desktop browsers. Although there isn’t yet as big a range of browsers to test in compared to other services like Litmus, BrowserLab has a benefit in that it provides some additional tools to help you compare the preview of your site in the different browsers.

Browser Sets in BrowserLab – Only preview preferred browsers.

Browser Sets in BrowserLab basically let you create groups of browsers that you want to have rendered when testing. This can save time over just having every browser preview rendered for your site, if you only want to see IE6 and IE7 then you can create a BrowserSet with only those contained in it.

Image of Browser Sets options

BrowserLab views menu option2-up View in BrowserLab

You can view a 2-up layout that lets you compare the differences between rendered previews. This creates a side-by-side view displaying two different browsers which you can quickly switch between to compare different browsers.

You can also zoom up to 200% to compare the previews more closely and also zoom out to 75% to get a more overall comparison.

Image of 2-up View in BrowserLab

Onion Skin view in BrowserLab

The Onion Skin view lets you compare two different previews but overlays them on top of one another. You can then use a slider to fade between the two selected browser previews, if you’re trying to work on something quite pixel accurate then this can be quite useful – although it has to be said that exact pixel placement accuracy of page layouts isn’t necessarily something to worry about. It’s still a pretty useful feature though.

Image of Onion Skin view in BrowserLab

Preview directly from Dreamweaver CS4 in BrowserLab

One other feature benefit that BrowserLab has over other services such as Litmus is that there is a Dreamweaver CS4 extension that allows you to test your site layouts directly from within Dreamweaver. The added benefit here is that this avoids the step of having to make your entire page live on the web before testing as it works with just the local files on your system.

As a beta release BrowserLab looks pretty good, although it does have some hot competition from services like Litmus and Browsershots – especially in regards to Litmus’ push towards supporting mobile Safari on iPhone / iPod touch.

To checkout BrowserLab for yourself, read more about it over at the BrowserLab pages at Adobe Labs website.

AVCHD Lite – What is it (and why can’t I edit it in iMovie or Final Cut)? (updated)

After a few years of being available there are now many hard-disk based video cameras that use the AVCHD format for video, support for the format in video editing software is well supported now on both Mac OS X and Windows by apps like Final Cut Pro / Express, iMovie, Adobe Premiere, VoltaicHD and more. This all leads to a much simpler experience for users of AVCHD cameras than it was a couple of years ago.

AVCHD Lite – Throwing a spanner in the works?

Image of Panasonic Lumix camera that uses the AVCHD Lite format

More recent digital stills camera have started coming with the ability to shoot HD video, for many of the small compact cameras there became a need for high-quality efficient video format that could be used in small compact cameras with less capable hardware. The solution to this was a variant of the AVCHD format called AVCHD Lite.

The main differences between AVCHD Lite and the regular AVCHD: a maximum resolution of 1280 x 720p in AVCHD Lite compared to 1920 x 1080p in regular AVCHD and a less-intensive compression method – both of which make the format more suitable for less powerful camera hardware.

Why can’t I edit AVCHD Lite in iMovie or Final Cut?

AVCHD Lite throws a spanner in the works because many of the existing AVCHD editing packages are incapable of supporting it without an update to the software. At the time of writing none of Apple’s video editing applications such as iMovie, Final Cut Pro or Express support the AVCHD Lite format. Adobe’s Premiere and Premiere Elements applications also do not appear to support AVCHD Lite at this time.

The only solution for AVCHD Lite on Mac OS X at the moment is the one that saved many an early adopter like myself a couple of years or so ago when AVCHD cameras first came out – VoltaicHD by Shedworx. This is a $35 app that will convert your AVCHD Lite footage to the Apple Intermediate Codec format that can then be used in any of Apple’s video editing applications.

Some Handy Links / References…

Here’s a few links to some handy information about AVCHD Lite:

Update:

As of 04/06/09 iMovie now supports editing of AVCHD Lite files with the iMovie 8.0.3 update!

FlamingoHD 1.0 released

I wrote a review of FlamingoHD a couple of months ago of their new media management application for Mac OS X called FlamingoHD (made by Shedworx, the makers of VoltaicHD).

At the time of the review FlamingoHD was available for sale as a beta version (for those early adopters!), however, Shedworx have reached their first milestone and have now released version 1.0 of FlamingoHD to the world!

The main new feature in the final version 1.0 release is a new filmstrip view that lets you see keyframes from the video clips in your library. This is really handy and lets you see what scenes are within your various clips:

For a more detailed overview read my previous post: FlamingoHD – Helping you manage your AVCHD media or checkout the FlamingoHD page on the Shedworx website.

How to restore a MySQL database from your Time Machine backup

I’m writing this as much to remind myself as for anyone else really :) I generally run databases running on my MacBook which I use for sites in active development, I then transfer these databases over to a staging server which are then use by other people in the team and sometimes clients to input site content. Last week I imported content from the staging server and overwrote my local database thinking that the staging server was the most up to date, but as it turned out I was incorrect!

Fortunately I’m running Mac OS X’s Time Machine backup on my MacBook so I didn’t see a problem as I could just restore it from that. However, in reality it wasn’t quite as straight forward to do, so here’s what I had to do in the end to restore this database from my Time Machine backup.

Step 1: Find your local databases

Navigate to the location of your MySQL databases. For my MySQL install this is found at /usr/local/mysql but depending on how you’ve installed MySQL it might be elsewhere.

As you’ll probably see that’s not a location you can just regularly view in the Finder on Mac so you’ll need to use the ‘Go to Folder…’ option within the ‘Go’ menu in the Finder.

Once you’ve got to that location you’ll see the MySQL data folder which shows up with a red no-access symbol on it so you can’t actually navigate straight into it via the finder. Seeing as we can’t access the folder to restore a specific database we’ll just restore the whole folder from the Time Machine backup instead.

Image of MySQL's Data folder in the Finder

Step 2: Shutdown your MySQL server

It’s important that you shut down your MySQL server process before you continue. How you do this depends on how you’ve got MySQL installed. If you installed MySQL from the official installer for OS X downloaded from the MySQL website then you may have the a System Preference which you can use to stop it.

If you’ve installed MySQL another way such as self-compiled or via Mac Ports or you just want to use the Terminal then you can stop it from the Terminal instead. The following command can be used:

sudo mysqladmin shutdown

If you don’t have MySQL configured in your path in Terminal you may need to use the full path to the mysqladmin command:

sudo /usr/local/mysql/bin/mysqladmin shutdown

The path to those files may vary depending on how you’ve installed MySQL so if it doesn’t work then you’ll need to check the correct location. Note that I’ve also used ‘sudo’ in that command in case you need root privileges to stop the MySQL process. Check the MySQL documentation for your version of MySQL for further help.

Step 3: Rename your MySQL data folder via the Terminal

Image of file listing in OS X's Terminal applicationThe next step is to rename your MySQL data folder temporarily to avoid any clashes when restoring the data folder from the Time Machine backup. First you need to get into your MySQL directory:

cd /usr/local/mysql

You can then list all the files to check you’re in the right place:

ls -al

You should now see all the files including the ‘data’ directory where the databases are located. We can now use the following command to rename the data directory:

sudo mv data data-bak

Once that’s done you should see your directory happily renamed in both the Terminal and the Finder window.

Step 4: Enter Time Machine to restore your MySQL data directory

The next step is to enter Time Machine mode and restore the data directory from the backup. I’m sure you probably know how to enter Time Machine mode but make sure you enter whilst focused on the MySQL Finder window.

Image of restored files in Finder windowGo back in time a sufficient amount so that you’ll definitely be getting the version of the data that you want, highlight the data folder and click Restore. Because we renamed the data directory Time Machine will simply restore the data directory without any prompts. You should now see both the restored data directory and the renamed data-bak directory.

Step 5: Copy the database from the restored data directory

You can now copy the database from the restored data directory, this is done via the following Terminal command:

sudo cp -R data-bak/my_database_name data/my_database_name

The database is actually a directory containing other files so you need to use the ‘-R’ flag to recursively copy all of these across with the directory itself.

Step 6: Delete the restored data directory and rename the data-bak directory

Now that the database is restored and copied you can safely delete the restored data directory as it’s no longer needed at this point. Note: Be very careful using the ‘rm’ command! Bad things can happen if used incorrectly!

sudo rm -R data

You can then rename the data-bak directory back to it’s original name ‘data’, note that the ‘mv’ command doesn’t require the ‘-R’ flag:

sudo mv data-bak data

Step 7: Check file permissions / ownership

You may need to check the file permissions and ownership of the database that you have just restored to make sure that it will be accessible by MySQL when it is running. These may vary depending on your MySQL install method but they should be something like this:

drwx—— 60 _mysql wheel 2040 8 May 12:14 my_database_name

Basically the directory is owned by the user ‘_mysql’ and in the group ‘wheel’. If you need to change the owner then use the following command:

sudo chown -R _mysql data/my_database_name

Step 8: Start up MySQL

Once this has all been done, you can then start MySQL again using either the System Preference if you have it or via the Terminal command:

sudo mysqld_safe &

or with the full path:

sudo /usr/local/mysql/bin/mysqld_safe &

Step 9: There is no Step 9!

Hopefully you should now be able to access your newly restored database. As I said at the beginning, this is the method I used to restore a database myself recently, there may be other ways to do it but hopefully these steps might be of use to anyone else in the same situation.

Clipstart – Simple video file management and uploading for Mac OS X

Clipstart is a newly released application that is designed to complement Photo applications such as iPhoto or Picasa. It offers a streamlined interface that lets you import video footage from video cameras, tag them and then upload them to either Vimeo or Flickr.

Image of Clipstart application iconThat’s Clipstart’s features summed up in one paragraph but the application does what it does really well. There’s been a growing need for applications like these to manage the ever increasing amount of consumer video that many people have on their computers these days. iMovie is great for editing video and iPhoto can import video into it’s library but neither of them are up to the task of file managing the quantity of video files that users of digital video devices (e.g. Flip, Kodak Z series and mobile phones such as the Nokia N series etc) tend to produce.

Clipstart lets you manage all these files simply and easily and lets you upload either whole clips or only specific sections of clips directly to both Vimeo and Flickr. There’s currently no YouTube support though, I’m not sure if this is because Apple’s iPhoto already supports YouTube directly but I could see YouTube being another location that users would like to publish too so perhaps this will come in future versions. Update: I remembered that the upcoming Snow Leopard Mac OSX 10.6 also features an updated version of Quicktime Player which can upload straight to YouTube, perhaps this is one reason why Clipstart doesn’t include it?

You can find out more about it over at the Clipstart website where there is a screencast that takes you through the workflow and features as well as a demo version that you can use to try it out for yourself. It costs $29 for a single user licence.

Working with HD video on Mac OSX? FlamingoHD is another good option to check out…

If you’re working with HD video then you’ll want to check out FlamingoHD which is a similar application to Clipstart but is more specifically focused on HD workflow and in particular providing support for the AVCHD format of HD video used on many hard disk based cameras. FlamingoHD does also support all other video formats supported by Quicktime so video from Flip and Kodak Z series cameras can be imported as well as digital stills.

CSS Naked Day 2009

It’s that time of year again when many websites suddenly lose their inhibitions and let their inner-html run free!!!

Well, kind of, it’s CSS Naked Day 2009 so that’s why Suburbia is appearing the way it is for a 48 hour period (it’s an international ‘day’ so the site stays naked for 48 hours so that both east and west get to see the naked sites!).

What’s the point of it all?

The idea behind this event is to promote Web Standards. Plain and simple. This includes proper use of (x)html, semantic markup, a good hierarchy structure, and of course, a good ‘ol play on words. It’s time to show off your <body>.