Apple previews Final Cut Pro X at NAB in Las Vegas

Apple made their presence felt at the NAB show in Las Vegas with a preview of the next version of their Final Cut Pro video editing app, Final Cut Pro X.

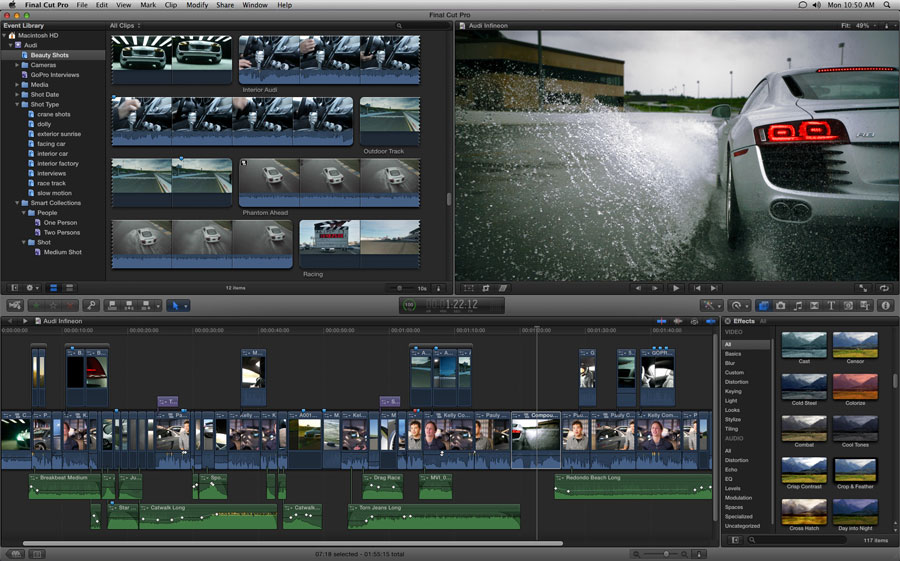
In what is no doubt a long overdue update Final Cut Pro X brings what a lot of Pro video users have been waiting for: a totally redesigned interface, 64-bit memory addressing, multi-processor support, background rendering (no more render window), GPU rendering, use of more than 4GB RAM, video sizes from standard def up to 4k, real-time native format video processing – that’s quite a list!
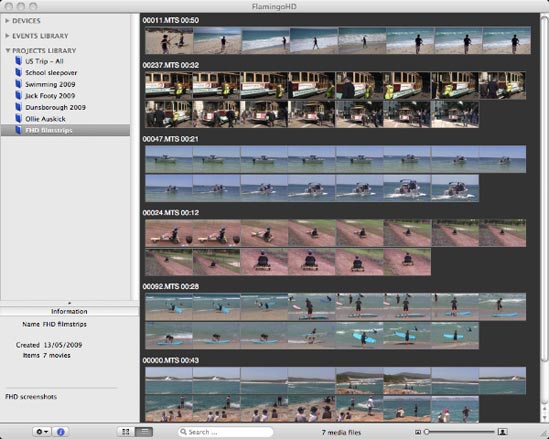
The other announcement that is pretty awesome – a new price: $299 (not sure what that’ll be in £GBP yet, about £199 I’d guess) and, similar to Apple’s Aperture software which had a price drop recently, Final Cut Pro X will be available through Apple’s Mac App Store.

Native AVCHD?

An often featured subject in blog posts here on Suburbia is the AVCHD file format. Previously AVCHD required transcoding into some other format such as ProRes in order to edit it in Final Cut Pro, so a good question is whether the new ‘real-time native processing’ feature means that this transcoding will be a thing of the past? This is a feature that Adobe’s Premiere Pro has had for a while, albeit one that requires quite powerful hardware to make use of it. It will be interesting to see how Final Cut Pro X compares with this.

June launch date

Final Cut Pro X is due to be launched through the Mac App Store in June. In the mean time you can find out more about the new features via a couple of YouTube clips filmed at the preview announcement:

Shedworx’ State of the Union 2010

I’ve written a few times about the various apps that the guys over at Shedworx make and I’m always keen to see how their product range is developing and improving.

They published a blog post recently outlining their development plans for 2010 and their main focus for 2010 is on two areas: AVCHD workflow and Digital Asset Management. As such there’s some great improvements in store for their VoltaicHD and FlamingoHD applications.

VoltaicHD: End-to-end native AVCHD workflow

In their post they talk about how they’ve always been working towards having a completely native AVHCD workflow for VoltaicHD which started with the basic AVCHD editor that was added to VoltaichHD 2.

The next step in the process is adding native AVCHD output from Voltaic including trimming / joining files. So you’ll be able to import AVCHD footage from your camera, do some simple editing and then output an AVCHD format file without having to do any format conversion. The end result should fast output of great quality files.

One cool aspect of this for me is that I’ll be able to edit some AVCHD footage and then burn it as an AVCHD disk that can play on my PS3 using Shedworx’ other app RevolverHD.

VoltaicHD is available as both Mac and Windows apps.

FlamingoHD: Improved Asset Management

FlamingoHD is Shedworx’ youngest product but one that has proven to be very useful for managing media imported from AVCHD cameras.

The areas to be improved in 2010 include re-working the media views to provide a faster, easier way to navigate your library.

Improvements in managing your library and metadata. Support for simple editing of all supported media types is also a planned feature.

FlamingoHD is available as as Mac app.

Shedworx Forums

So, I’m looking forward to seeing the improved apps as they’re released. Don’t forget too that Shedworx have support Forums on their website so if you’re looking for help and support with their products then it should be first on your list of places to go:

http://shedworx.com/forum

VoltaicHD 2.0: Edit, Convert, Upload AVCHD / AVCHD Lite video

Shedworx‘ essential AVCHD tool VoltaicHD just took a healthy step forward in functionality with the recent release of VoltaicHD 2. Highlights of the new features in the update are the ability to preview AVCHD / AVCHD Lite clips, the ability to edit native AVCHD video and the ability to upload video to YouTube and output to presets like iPhone, iPod etc.

Native AVCHD / AVCHD Lite editing

Version 2 of VoltaicHD increases the scope of the app from simply being a tool to convert AVCHD format video footage to now include basic native editing of AVCHD footage. You can now preview AVCHD / AVCHD Lite video clips within the application and then set simple in and out points to define a section of raw AVCHD / AVCHD Lite video clips which can then be trimmed down and converted.

The interface is reminiscent of the new Quicktime X player that comes with the Mac OSX 10.6 Snow Leopard. It’s very easy to set the position of the start and end as the position in seconds within the movie is shown in a little tooltip when sliding them around. My own criticism with it is the same that I have with the new Quicktime X player in that you can’t use the mouse to fine-tune the position of these points. That’s a little thing that I miss from the old Quicktime Pro player’s editing capabilities.

Overall though the ability to trim down clips before conversion is a massive timesaver, instead of having to convert a whole chunk of AVCHD footage you can just roughly trim down to the section you want and then convert only the bit you want. Definitely a great and helpful improvement!

Upload to YouTube, output to iPhone / iPod and AppleTV.

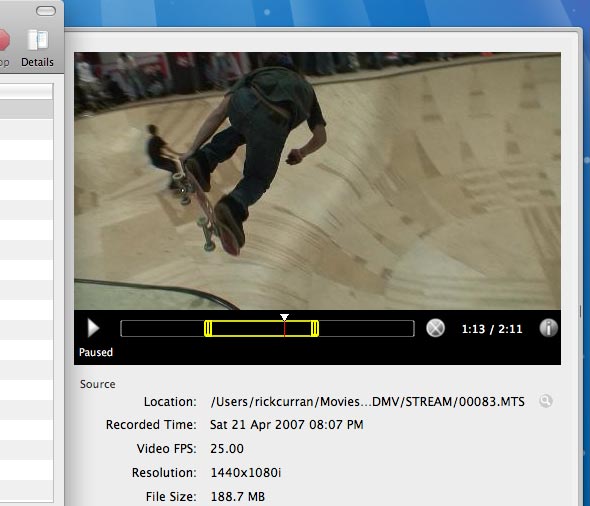
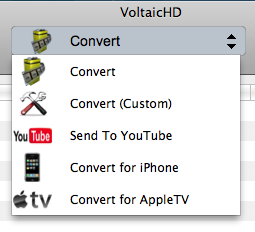
Along with the new preview / edit capability there is also the ability to convert and upload trimmed clips to YouTube directly from VoltaicHD 2.0. There are also preset output options for iPhone / iPod and AppleTV.

One of the things you’ll notice when you run VoltaicHD 2 compared to the previous version is the new drop-down menu options at the top of the window. From this menu you can select the specific option that you want, then combine that with a little bit of previewing and trimming in the clip details panel and you’re ready to go.

Both of these options make it really easy to get footage off your camera and online or onto your devices, take it with you or watch it on TV. Shedworx make another application called RevolverHD which enables you to create AVCHD DVDs that will work on most blu-ray players, however I find the ease of exporting video that’s ready to go onto my iPhone really convenient. As blu-ray players become more commonplace then I think I’ll use RevolverHD much more as a perfect way to send HD footage to my extended family.

Worth the upgrade cost for existing users?

It’s most definitely an upgrade I’d recommend for any VoltaicHD user, it’s worth noting that this is the first paid upgrade to Voltaic since it was released in July 2007. Don’t forget that VoltaicHD is available for both Mac OSX and Windows operating systems too.

If you’re an existing VoltaicHD user then you can upgrade to version 2 for only $9.99, or if you happen to have bought the previous version since July 2009 then you’re eligible for a free upgrade to VoltaicHD 2.0. First-time customers can buy VoltaicHD 2.0 for $39.99 which is still a great deal for a great bit of software!

Shedworx’ VoltaicHD app to add native preview / edit features

The Shedworx guys are always busy working away on improving their applications (VoltaicHD, FlamingoHD, RevolverHD) for working with AVCHD video. In a recent blog post on their site they highlighted the fact that Mac OSX 10.6 Snow Leopard doesn’t bring any changes in support for the AVCHD video format, basically OSX 10.6 still can’t natively open or edit AVCHD video so it needs to be converted in order to be edited within apps such as iMovie or Final Cut Pro.

This lack of native support has encouraged the Shedworx guys to bring some simple trimming and editing features into version 2 of VoltaicHD which will hopefully be out in October. This will be a really handy feature as it will allow some very quick editing of files without the need for conversion. It will be especially useful if you just want to grab a small section of a clip and convert that for editing in iMovie or Final Cut instead of having to convert the entire clip.

So far they’ve got basic trimming features working and have published a demo movie showing how it works, all in all it’s looking to make VoltaicHD an even handier application!

Update – VoltaicHD 2 released in October 2009

Shedworx have released version 2 of VoltaicHD adding new features such as preview of AVCHD / AVCHD Lite clips, native editing of AVCHD video and the ability to upload video to YouTube. I’ve written a post with an overview of VoltaicHD 2.

AVCHD Lite – What is it (and why can’t I edit it in iMovie or Final Cut)? (updated)

After a few years of being available there are now many hard-disk based video cameras that use the AVCHD format for video, support for the format in video editing software is well supported now on both Mac OS X and Windows by apps like Final Cut Pro / Express, iMovie, Adobe Premiere, VoltaicHD and more. This all leads to a much simpler experience for users of AVCHD cameras than it was a couple of years ago.

AVCHD Lite – Throwing a spanner in the works?

Image of Panasonic Lumix camera that uses the AVCHD Lite format

More recent digital stills camera have started coming with the ability to shoot HD video, for many of the small compact cameras there became a need for high-quality efficient video format that could be used in small compact cameras with less capable hardware. The solution to this was a variant of the AVCHD format called AVCHD Lite.

The main differences between AVCHD Lite and the regular AVCHD: a maximum resolution of 1280 x 720p in AVCHD Lite compared to 1920 x 1080p in regular AVCHD and a less-intensive compression method – both of which make the format more suitable for less powerful camera hardware.

Why can’t I edit AVCHD Lite in iMovie or Final Cut?

AVCHD Lite throws a spanner in the works because many of the existing AVCHD editing packages are incapable of supporting it without an update to the software. At the time of writing none of Apple’s video editing applications such as iMovie, Final Cut Pro or Express support the AVCHD Lite format. Adobe’s Premiere and Premiere Elements applications also do not appear to support AVCHD Lite at this time.

The only solution for AVCHD Lite on Mac OS X at the moment is the one that saved many an early adopter like myself a couple of years or so ago when AVCHD cameras first came out – VoltaicHD by Shedworx. This is a $35 app that will convert your AVCHD Lite footage to the Apple Intermediate Codec format that can then be used in any of Apple’s video editing applications.

Some Handy Links / References…

Here’s a few links to some handy information about AVCHD Lite:

Update:

As of 04/06/09 iMovie now supports editing of AVCHD Lite files with the iMovie 8.0.3 update!

FlamingoHD 1.0 released

I wrote a review of FlamingoHD a couple of months ago of their new media management application for Mac OS X called FlamingoHD (made by Shedworx, the makers of VoltaicHD).

At the time of the review FlamingoHD was available for sale as a beta version (for those early adopters!), however, Shedworx have reached their first milestone and have now released version 1.0 of FlamingoHD to the world!

The main new feature in the final version 1.0 release is a new filmstrip view that lets you see keyframes from the video clips in your library. This is really handy and lets you see what scenes are within your various clips:

For a more detailed overview read my previous post: FlamingoHD – Helping you manage your AVCHD media or checkout the FlamingoHD page on the Shedworx website.

Clipstart – Simple video file management and uploading for Mac OS X

Clipstart is a newly released application that is designed to complement Photo applications such as iPhoto or Picasa. It offers a streamlined interface that lets you import video footage from video cameras, tag them and then upload them to either Vimeo or Flickr.

Image of Clipstart application iconThat’s Clipstart’s features summed up in one paragraph but the application does what it does really well. There’s been a growing need for applications like these to manage the ever increasing amount of consumer video that many people have on their computers these days. iMovie is great for editing video and iPhoto can import video into it’s library but neither of them are up to the task of file managing the quantity of video files that users of digital video devices (e.g. Flip, Kodak Z series and mobile phones such as the Nokia N series etc) tend to produce.

Clipstart lets you manage all these files simply and easily and lets you upload either whole clips or only specific sections of clips directly to both Vimeo and Flickr. There’s currently no YouTube support though, I’m not sure if this is because Apple’s iPhoto already supports YouTube directly but I could see YouTube being another location that users would like to publish too so perhaps this will come in future versions. Update: I remembered that the upcoming Snow Leopard Mac OSX 10.6 also features an updated version of Quicktime Player which can upload straight to YouTube, perhaps this is one reason why Clipstart doesn’t include it?

You can find out more about it over at the Clipstart website where there is a screencast that takes you through the workflow and features as well as a demo version that you can use to try it out for yourself. It costs $29 for a single user licence.

Working with HD video on Mac OSX? FlamingoHD is another good option to check out…

If you’re working with HD video then you’ll want to check out FlamingoHD which is a similar application to Clipstart but is more specifically focused on HD workflow and in particular providing support for the AVCHD format of HD video used on many hard disk based cameras. FlamingoHD does also support all other video formats supported by Quicktime so video from Flip and Kodak Z series cameras can be imported as well as digital stills.

FlamingoHD – Helping you manage your AVCHD media

FlamingoHD is a new application by Shedworx (the guys that make VoltaicHD), with the purpose of helping you manage all of your AVCHD video footage. Although AVCHD has greater than ever support these days it still presents a challenge when it comes to managing all of the video that you’ve shot, especially as the convenience of shooting straight to disk or card kind of encourages you to record a lot more than you would when using tape!

FlamingoHD provides a solution to this problem by enabling direct import from your AVCHD camera or alternatively importing AVCHD clips that are already on your hard disk. It does this by providing a preview thumbnail of the video footage before you import it, this saves a lot of time compared to iMovie or Final Cut Pro as you can choose only the clips you want without having to convert the footage first.

The user interface is easy to understand as it features a left hand menu very similar to iPhoto or iTunes which contains sections for Devices, Events and Projects, very similar to the iLife applications.

Importing AVCHD footage into FlamingoHD:

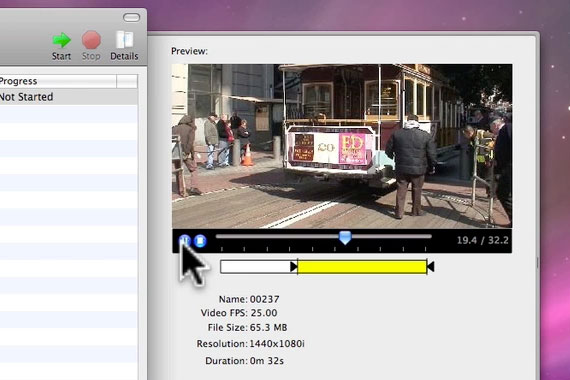
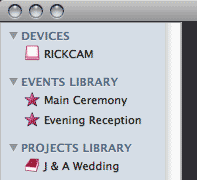
The basic process is to select the source of your video footage. You can either connect your camera to your computer which will automatically show up in FlamingoHD as a device, or you can select ‘Import Media’ from the File menu to select either a single clip or a folder containing clips from a location on your hard disk, once selected they will show as a device in the ‘Devices’ section in the left hand menu. It’s also worth clarifying that FlamingoHD will actually import video, audio and images from your source device or location and can manage all of these assets within Events and Projects.

Setting Preferences and Creating Events:

With a device selected ready for import you can then choose which clips you want to import into FlamingoHD, the imported files will automatically become an Event, or more than one Event if there are multiple clips shot on more than one day. This can be controlled by a preference which allows you to switch off this feature if you just want to import everything into one event.

The application preferences are worth checking out as there are a couple of other important preferences to consider. The first is ‘Hide media already imported’ which is enabled by default, this is useful when there are a lot of clips on a camera that you have already imported as it hides the ones you’ve already brought in.

The second important preference is ‘Copy imported media to Library area’, it’s important to set this appropriately because if it is ticked any clips imported from a folder on your computer will be copied to FlamingoHD’s Library which will take up more space and will result in duplicate files. Clips imported directly from a camera will be copied to the library regardless of this setting, the location of the Library for FlamingoHD can be set in the Base Location preference under the General tab.

Creating Projects:

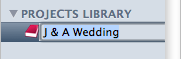
Once you’ve imported clips into FlamingoHD you can then group clips together into Projects, these projects can then be sent to exported in via several methods, either ready for editing or as final output.

Projects are created by selecting ‘New Project…’ from the File menu, this adds an entry under the Projects section of the left hand menu which you can name to suit. Once the Project has been created you can drag and drop clips from any of the events that you previously created.

Exporting / Converting Projects:

After creating a project you can then choose to export or convert your files. FlamingoHD has options to send files to VoltaicHD, RevolverHD, iMovie and also to the assets folder of other editing applications such as Final Cut Express or Final Cut Pro.

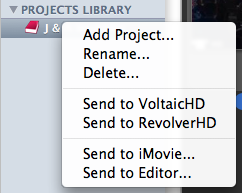
You can export by either right-clicking on the Project name or by selecting the Project and clicking on the ‘Media’ option from the main menu. The four options at the bottom of the menu allow you several choices for your project:

Send to VoltaicHD
This option will send your footage to VoltaicHD and it will be queued up and converted ready for use in whatever application you want.

Send to RevolverHD
Selecting this option will send your AVCHD files to RevolverHD where they can be burned as either AVCHD DVD or Blu-ray DVDs that can be played back on Blu-ray players such as the Playstation 3.

Send to iMovie…
This option is specifically for sending your project to iMovie, it creates a new project in iMovie and sends your clips to VoltaicHD for conversion, once converted you can open iMovie and all of the clips will be there in the new project.

Send to Editor…
Using this option will send files to a folder in the assets location of your preferred editing software, you can set this option in the Preferences of FlamingoHD. The AVCHD clips will be converted in VoltaicHD and copied to the folder. You can then open your editing software and bring in the files that are ready for editing.

In Beta and available now!

FlamingoHD has worked pretty well for me so far but it is worth pointing out that (at the time of writing) that it is a 0.1 version, as such it’s beta software and still being actively developed. However, the developers Shedworx have made it available to purchase now for the reduced price of $29.99 while it is in beta, the price will increase after the beta period.

FlamingoHD already provides a very useful application for managing all of your AVCHD media, but one aspect I haven’t mentioned is that it will also handle any video format that is supported by Quicktime so it can also be used for cameras that don’t use AVCHD as the video format. For me this is the key to the application’s potential, it fulfils a function that Apple’s own iLife suite doesn’t provide, that of being a specific video asset management tool.

The only criticism I can see is that it currently doesn’t provide direct playback of the video clips that are imported into it, instead the files are opened into Quicktime player. The biggest drawback of this being that Quicktime player doesn’t currently support AVCHD clips. However, Apple’s next release of Mac OS X, 10.6 ‘Snow Leopard’, is supposed to support AVCHD so that will be one solution, but in the meantime perhaps enabling AVCHD clips to open in the open source VLC player could be integrated as this already provides playback of AVCHD footage. The next release version 0.2 will provide a film-strip view of clips which will at least make it easier to examine the clips in more detail without needing to open them.

Give it a try for yourself, there’s a demo version that is limited to a maximum of 2 events, 2 projects and 50 clips, this gives you enough to try it out and kick the tyres. There are also demo versions of VoltaicHD and RevolverHD so you can test out the whole workflow. Finally, don’t forget to give feedback to the developers via the FlamingoHD contact form, they’re keen to consider people’s ideas and to hear about any issues people encounter with the software.

State of the Union for AVCHD: Premiere CS4, MotionBox, VoltaicHD and AVCHD Lite

I thought it would be good to take a quick look at how support for AVCHD video has progressed over the last year. When I first wrote about AVCHD back in June 2007 there was very little support, cameras had been out for quite a few months but with no real support for the AVCHD format, not even within Sony’s own Windows-only Vegas editing software, never mind any kind of Mac support.

Since then however support has improved and there are quite a few options for working with AVCHD and cameras are in widespread use. Here are a few notable developments surrounding AVCHD video format.

Adobe Premiere CS4

With the release of Adobe’s new CS4 suites brought back a Mac OSX version of Adobe Premiere CS4. What is interesting about Premiere CS4’s AVCHD support is that it is native and doesn’t require any conversion of the video footage when importing. Interestingly it will also support playback of mixed media types all in the same timeline.

Premiere was the first digital editing software I ever used and in it’s day was awesome. This new release does sound like Adobe have made some great improvements and have made a worthy rival to Final Cut and Avid.

Here’s a few links relating to Premiere CS4:

MotionBox Announces Full Support for HD Video Format (AVCHD)

MotionBox is a video sharing site that was the first to implement support for uploading AVCHD format video. It’s actually quite a handy way to share video online and in the process convert your AVCHD video clips as MotionBox will also create Quicktime compatible MP4 versions of your video for your computer and your iPod.

Here’s a link to the feature announcement on the MotionBox blog:

Shedworx’ AVCHD applications – VoltaicHD, RevolverHD and FlamingoHD

I’ve blogged about the Shedworx applications a few times, but where would many owners of AVCHD cameras be (especially the early adopters who bought them in late 2007!) without VoltaicHD?

Although VoltaicHD was originally just a Mac OSX application it has also been available as a Windows PC version for some time too. Among the many benefits that VoltaicHD brings is a low cost way to edit video on Mac, especially for users on older Macs running PowerPC chips that aren’t supported by either iMovie 08 / 09 or Final Cut Studio. Windows PC users can also edit HD footage from their AVCHD camera for a low cost by using VoltaicHD and Windows Movie Maker. VoltaicHD has helped make AVCHD a practical format for video editing.

Shedworx are soon to release the first version of a media management application called FlamingoHD which is intended to complement VoltaicHD and provide management and workflow of HD footage.

Here are links to the VoltaicHD and FlamingoHD product pages:

AVCHD Lite

AVCHD Lite is a new variation of AVCHD which supports only the lower 1280x720p HD format. It actually uses a variation on regular AVCHD so many applications may require a software update to support cameras using the Lite variation. AVCHD Lite is generally targeted as a format for small point-and-shoot digital cameras that take a step up to HD video from the regular 640×480 standard definition video found on many of these cameras until now. Panasonic’s Lumix ZS3 and TZ7 are examples of cameras using AVCHD Lite.

Here’s a few links relating to AVCHD Lite:

Budget AVCHD editing in Windows: VoltaicHD for PC and Windows Movie Maker!

I’ve previously written about How to edit AVCHD footage on Mac OSX, at the time of writing that article there weren’t many options for editing AVCHD footage on either Mac OSX or Windows operating systems. VoltaicHD is a great application that helped Mac OSX users in particular because at that time there was no way of editing AVCHD on Mac at all.

Many Mac users had purchased AVCHD cameras and were frustrated by the complete lack of software available for editing AVCHD on Mac and even Windows users had to wait quite a few months before Sony released a version of their Vegas software that supported AVCHD.

Since then though, there are quite a few options for Mac users: Final Cut Studio and Final Cut Express offered mid to high end products for the Mac platform. Also Apple’s own iMovie software had a complete revamp and amongst many new features was direct support for AVCHD based cameras, a perfect budget solution as the software was included free with any new Mac or as part of Apple’s iLife suite for about £55 / $79.

However for Windows users, despite the availability of software like Sony Vegas, many people wanted a way to edit AVCHD without having to buy editing software that cost as much (or more!) than they spent on their cameras in the first place! There was no easy way to do this on a low budget, you could find articles on the web with instructions on how to use various applications or utilities to convert the AVCHD files into various formats, but nothing simple that would allow non-technical users to edit AVCHD footage. But now there is an easy solution.

VoltaicHD for PC & Windows Movie Maker: A low budget way to edit AVCHD!

The company that produced the VoltaicHD application for Mac OSX, Shedworx, has released a Windows version of VoltaicHD that is compatible with both Windows XP and Vista. You can convert your AVCHD footage into WMV or AVI format video which can then be used with Windows Movie Maker or other video editing application for Windows.

Windows Movie Maker is a video editing package that comes with both XP and Vista, and contrary to popular belief it is actually capable of working with HD video footage, but just not with native AVCHD footage. That’s where VoltaicHD fits in, by converting the footage to WMV format you can edit the footage from your HD video camera using just Windows Movie Maker!

Tips for converting / editing AVCHD with Voltaic and Windows Movie Maker

There are a few minimum system requirements to run VoltaicHD for PC but any reasonably modern PC should be capable of processing the AVCHD files. It’s worth noting of course that HD video is very intensive to work with and requires greater resources than editing conventional standard definition video footage. On a system with the minimum hardware requirements (as detailed below) it will take about 2 minutes to convert a 10 second AVCHD clip. It is obviously recommended to have as powerful a system as you can manage but even a slightly older machine should be capable of producing results – as long as you have a little patience and perspective! On the plus side the converted video files result in uncompressed HD video which can be played back more easily than the original AVCHD files on the minimum hardware spec machine.

Minimum Hardware requirements: At least 1GB of RAM, at least a 2Ghz P4 processor or equivalent processor and as much hard disk space as possible. AVCHD footage uses about 120Mb per minute of video footage, once this footage has been processed it uses about 500Mb per minute of video, so disk space is quickly used up.

Minimum Software requirements: Either Windows XP SP2+ or Vista, Microsoft Movie Maker 2.1+ and Windows Media Player v11+.

VoltaicHD can convert AVCHD footage to either WMV or AVI formats, however WMV is the preferred format as it keeps the aspect ratio correct no matter the resolution of your source AVCHD footage. There is no loss in picture quality when converting the AVCHD footage to either WMV or AVI. However, the audio track is affected during conversion, AVCHD can use Dolby 5.1 surround sound but only Sony cameras use this, Panasonic, Canon and JVC use stereo only. Any Dolby 5.1 sound is dropped back to stereo audio as this is all that Window Movie Maker supports.

Converting files using VoltaicHD for PC

You need set up the various preferences before using VoltaicHD for the first time, you can go back and change these preferences later by going to the Tools->Options menu option, or via the toolbar button.

  • Scratch file location: VoltaicHD creates temporary files during conversion, you can set where these should be created to a location of your choice. If you are converting large files from an external storage location, and want to preserve disk space on the machine running the conversions, you should set this location to be on the external storage device.
  • Output Directory: You can set where the final converted final files will be placed.
  • Extract 5.1ch Audio: The audio track from your movie can be extracted during the conversion process.
  • Output Format: WMV format is the recommended format for your converted clips.

Once you’ve got VoltaicHD installed on your system and Preferences all set up you are ready to go. Although it’s worth keeping in mind some suggestions for converting your AVCHD clips:

  • Make sure to copy all clips from your camera onto your hard drive before converting. It’s not worth risking trying to convert footage straight from your camera as it can be problematic.
  • Keep a VoltaicHD shortcut on your Desktop, this makes it easy to just drag AVCHD clips onto it ready for conversion, or just to open up the application ;)
  • Try closing down any unnecessary programs during the conversion process. Converting AVCHD footage is very processor / memory intensive so freeing up resources on your computer helps a lot.
  • Watch out when converting large AVCHD files if using a FAT32 formatted drive as the converted files may result in files larger than the 2Gb limitation of FAT32 will allow.

Next, add some AVCHD files to the file list and press Start. The converted files are created in the same directory as the source files by default, or to the location you set in your Preferences.

Setting up and editing in Windows Movie Maker

You need to set up Movie Maker to the correct video format for your region, either PAL or NTSC, and also to widescreen (16:9). Go to Tools->Options and click on the Advanced tab. You should then see a section called Video properties where you can set the correct format (NTSC or PAL) and also the Aspect ratio to 16:9. There’s no need to set the video format (NTSC or PAL) in VoltaicHD as this is auto-detected from the AVCHD clip.

You can now edit your HD footage just like you would with any other footage in Windows Movie Maker.

Exporting from Windows Movie Maker

VoltaicHD provides an export profile for Movie Maker 2.1 on Windows XP which ensures that the full HD resolution of your completed movie can be exported.

To Export from Movie Maker, select the File->Save Movie menu option. This starts the Save Movie Wizard. Use the following settings:

  • Movie Location: My Computer
  • Choose a name for your exported movie
  • Movie Setting: select Other, then VoltaicHD 1080 from the drop down.
  • Note: Select VoltaicHD 1080 PAL or NTSC, based on the format you are using.

If you are using Movie Maker in Windows Vista, then VoltaicHD provides an export profile to ensure that the full HD resolution of your completed movie can be exported. If your movies are in 1440×1080 resolution you will also need to manually apply an Effect to your clips to retain the full 16:9 aspect or Widescreen mode. Once your clips are in your storyboard or timeline, right click each of the clips and select “Effect”. On the next window under “Available Effects” scroll down and click on “VoltaicHD Widescreen” then select “Add >>". Then select OK. The preview window should now be showing your clip in widescreen mode.

To Export from Movie Maker, select the File->Publish Movie menu option. This starts the Save Movie Wizard. Use the following settings:

  • Movie Location: My Computer
  • Choose a name for your exported movie
  • Movie Setting: select Other, then VoltaicHD 1080 from the drop down.
  • Note: Select VoltaicHD 1080 PAL or NTSC, based on the format you are using.

Movie Maker will then create your HD movie! All thanks to VoltaicHD for PC!

Playing back your HD footage

If you want to watch your HD footage on something other than your PC then you can watch on XBox, PS3 or any Blu-ray player. You’ll need something like Nero to burn a blu-ray DVD (AVCREC format).

The makers of VoltaicHD for PC make some software called RevolverHD which can create blu-ray compatible DVDs. However, there’s currently only a Mac version available, so if you happen to have access to a Mac then you can use that. If you’d like a PC version of RevolverHD then get in touch with the guys at Shedworx and let them know.

Happy editing :)

Update – VoltaicHD 2 released in October 2009

Shedworx have released version 2 of VoltaicHD adding new features such as preview of AVCHD / AVCHD Lite clips, native editing of AVCHD video and the ability to upload video to YouTube. I’ve written a post with an overview of VoltaicHD 2.