So, it’s been a while since I’ve blogged, actually it was last year! Anyway, asides from *not* blogging I had a great break over the Christmas holidays. I had a good bit of time off work which gave me a chance to really chill out and just relax. I’m now back at work and feeling quite refreshed and focused now.
Being a big fan of all things Apple I was intrigued when they brought out the Nike+iPod sports kit as to how it worked, not being into running or owning an iPod Nano I didn’t think much more about it. Anyway, one of the things I got for Christmas ’06 was an iPod Nano (it was actually a present to myself, ahem…), I’m not really much of a runner, much preferring things with wheels or that go on snow or water, but with the winter weather making it hard to find time to skate I thought it would be a good way to get into better shape. Also I was amused by a blog post by Cabel Sasser so I got more interested in getting one. Go read Cabel’s blog post as it really is quite funny and kind of echoes my experience. Anyway, on with the main point of this blog entry which is mainly to take a wee look at how you can do the Nike+iPod thing on a budget!
Part of the deal with the kit is that it’s intended to work with particular shoes that Nike make, however, not wanting to spend like £60+ on a pair of running shoes I knew there would be a way to do it using any pair of running shoes. Ok, the ingredients I found for cheap running experience:
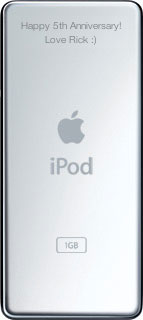
Brand new shiny iPod Nano
(2GB basic model) £90.00
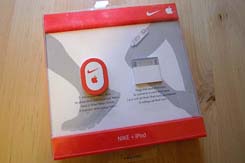
Nike+iPod Sports kit, sensor on the left,
iPod attachment on the right. £20.00
The Nano was purchased on Amazon.co.uk for about £90 delivered, I managed to find the Nike+iPod kit in a local sports shop so no delivery cost there.

The sensor for your shoe.
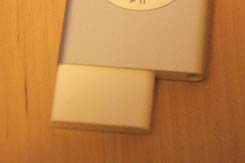
The receiver attached to the iPod
The kit comprises a sensor that you put in your shoe and a receiver that attaches to your iPod Nano, information about your running progress is transmitted from the sensor to the receiver (via some form of bluetooth protocol). You get audio feedback in your headphones as you run telling you how far you’ve gone, and if you run longer than you have before you get a nice little message from a famous athlete (I’ve heard Paula Radcliffe and Lance Armstrong so far!).
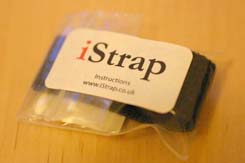
The handy ‘iStrap’! (Please note,
this is not an Apple product!) £1.00
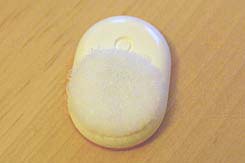
The iStrap’s velcro disk attached
to the back of the sensor.
Now, the key ingredient to do the ‘Nike+iPod on a budget’ thing. Presentiing the ‘iStrap’, which is basically a velcro strap and disk that you use to attach the sensor to your shoe. Cost benefit of this over paying £60+ on a pair of the proper Nike+ running shoes? The iStrap is £1.00. Savings? At least £59.00 ;)
The right-hand image above shows the velcro disk attached to the sensor.

The Asics running shoes (looking
very new and shiny still). £20.00
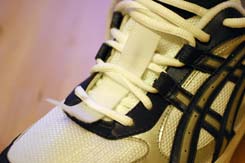
Closeup of the iStrap fitted under
the laces of the running shoes.
Ok, to be fair I have to offset the £59.00 saving with the cost of a ‘normal’ pair of running shoes. So, in the January sales I got a great pair of Asics shoes for £20, so that brings the savings to about £39.00 I guess.
The image to the right above shows the iStrap fitted under the laces of the shoe.
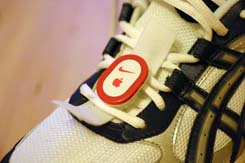
Nike+iPod sensor stuck on the velcro
via the already applied velcro disc.
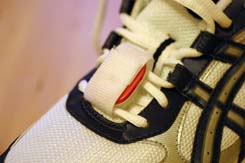
The sensor enclosed by the iStrap, it’s
held in place quite securely.
The sensor is then attached to the velcro strap which is folded over the top and fastened securely. I was a bit worried about how secure it would be but it’s actually pretty solid, which is good because the sensor doesn’t want to be rattling around as it can affect the measurements taken from it.
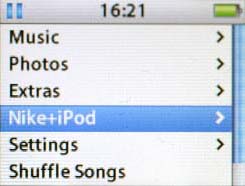
Plugging in the sensor results in an
Additional Nike+iPod Menu item.
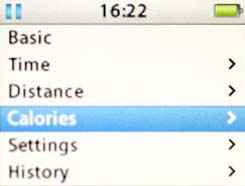
Some of the menu items found within
the new Nike+iPod Menu item.
On the iPod itself you get a new entry appearing in the options, once you select the Nike+iPod option you then get other options for choosing the type of workout you want to do. You can choose workouts based on Time, Distance or Calories and you can view past workouts.
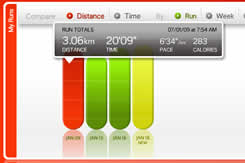
Nikeplus.com shows the details of the runs that you upload via iTunes.
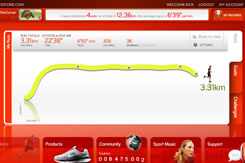
You can view the progression
made on your individual runs.
Once you’ve completed a run you then hook up your iPod and the data taken from your run is synced up to the Nikeplus.com website, you can then log in and view the progress of your run in the form of a graph. The graph is accompanied in text form with details like distance, time, pace, calories, type of workout and playlist chosen for the run.
Total cost of my running kit…
- iPod Nano – £90
- Nike+iPod Sports Kit – £20
- iStrap – £1
- Asics running shoes – £20
- Reebok running pants – £15
- Total: £146.00
That’s great, but does it help you run?
That’s a question you might ask, but it really does help you run. As the title of this post states, I’m kind of a non running geek (not that I’m inactive by any means, just never been into running!) but the kit makes running much more interesting for me, the audio feedback for each kilometre (I run in metric!) you run helps you to see the goal you’re aiming for rather than kind of aimlessly running around! So yes, it’s not just a gimmick, it really does help!
~Rick







 The Synopsis: