Adobe BrowserLab – Hosted Browser testing from Adobe

BrowserLab logoAdobe have added a lot of new projects to their Labs page over at http://labs.adobe.com since I’d last checked it out. In particular there’s a new service / product called BrowserLab that allows you to test web pages in various browsers along the lines of Litmus, Browsershots or Netrenderer. Adobe describe BrowserLab as:

BrowserLab provides web designers exact renderings of their web pages in multiple browsers and operating systems, on demand. BrowserLab is a powerful solution for cross-browser compatibility testing, featuring multiple viewing and comparison tools, as well as customizable preferences. Since BrowserLab is an online service, it can be accessed from virtually any computer connected to the web. Also, Adobe Dreamweaver® CS4 software users have access to additional functionality such as testing local and active content.

This service / app has been in development for some time, Adobe actually showed a sneak peak of it back in November at their Max Conference under the code name ‘Meer Meer‘. So although this might seem like Adobe playing catchup with Microsoft’s recent ‘SuperPreview‘ release it’s actually nothing of the sort. If you compare BrowserLab with SuperPreview you’ll see that they’re quite different apps – primarily that SuperPreview is a Windows app that only let’s you preview IE6 and either IE7 or 8 depending on which is installed – and of course requires you to be running on Windows to use it whereas BrowserLab is a browser based application that simply requires the Flash plugin and therefore works on both Windows, Mac and Linux.

Browser and OS versions currently supported in BrowserLab at this time are:

  • Firefox 2.X and 3.X (Windows XP and Mac OS X)
  • Internet Explorer 6.X and 7.X (Windows XP)
  • Safari 3.X (Mac OS X)

So a good range of browsers are covered, although IE8 really needs to be there along with Opera as well to really cover all the main desktop browsers. Although there isn’t yet as big a range of browsers to test in compared to other services like Litmus, BrowserLab has a benefit in that it provides some additional tools to help you compare the preview of your site in the different browsers.

Browser Sets in BrowserLab – Only preview preferred browsers.

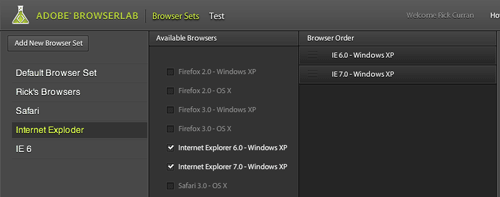
Browser Sets in BrowserLab basically let you create groups of browsers that you want to have rendered when testing. This can save time over just having every browser preview rendered for your site, if you only want to see IE6 and IE7 then you can create a BrowserSet with only those contained in it.

Image of Browser Sets options

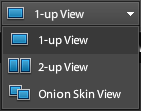
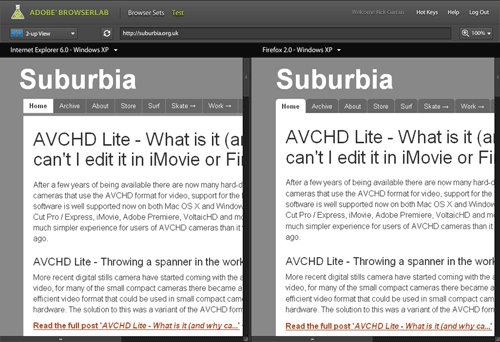
BrowserLab views menu option2-up View in BrowserLab

You can view a 2-up layout that lets you compare the differences between rendered previews. This creates a side-by-side view displaying two different browsers which you can quickly switch between to compare different browsers.

You can also zoom up to 200% to compare the previews more closely and also zoom out to 75% to get a more overall comparison.

Image of 2-up View in BrowserLab

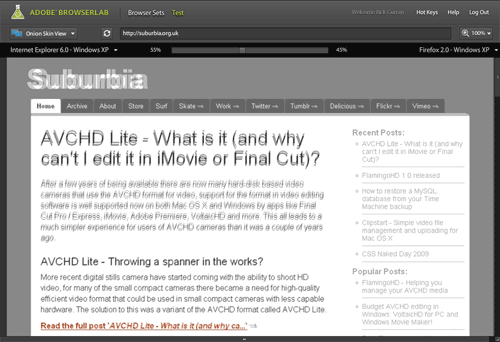
Onion Skin view in BrowserLab

The Onion Skin view lets you compare two different previews but overlays them on top of one another. You can then use a slider to fade between the two selected browser previews, if you’re trying to work on something quite pixel accurate then this can be quite useful – although it has to be said that exact pixel placement accuracy of page layouts isn’t necessarily something to worry about. It’s still a pretty useful feature though.

Image of Onion Skin view in BrowserLab

Preview directly from Dreamweaver CS4 in BrowserLab

One other feature benefit that BrowserLab has over other services such as Litmus is that there is a Dreamweaver CS4 extension that allows you to test your site layouts directly from within Dreamweaver. The added benefit here is that this avoids the step of having to make your entire page live on the web before testing as it works with just the local files on your system.

As a beta release BrowserLab looks pretty good, although it does have some hot competition from services like Litmus and Browsershots – especially in regards to Litmus’ push towards supporting mobile Safari on iPhone / iPod touch.

To checkout BrowserLab for yourself, read more about it over at the BrowserLab pages at Adobe Labs website.

AVCHD Lite – What is it (and why can’t I edit it in iMovie or Final Cut)? (updated)

After a few years of being available there are now many hard-disk based video cameras that use the AVCHD format for video, support for the format in video editing software is well supported now on both Mac OS X and Windows by apps like Final Cut Pro / Express, iMovie, Adobe Premiere, VoltaicHD and more. This all leads to a much simpler experience for users of AVCHD cameras than it was a couple of years ago.

AVCHD Lite – Throwing a spanner in the works?

Image of Panasonic Lumix camera that uses the AVCHD Lite format

More recent digital stills camera have started coming with the ability to shoot HD video, for many of the small compact cameras there became a need for high-quality efficient video format that could be used in small compact cameras with less capable hardware. The solution to this was a variant of the AVCHD format called AVCHD Lite.

The main differences between AVCHD Lite and the regular AVCHD: a maximum resolution of 1280 x 720p in AVCHD Lite compared to 1920 x 1080p in regular AVCHD and a less-intensive compression method – both of which make the format more suitable for less powerful camera hardware.

Why can’t I edit AVCHD Lite in iMovie or Final Cut?

AVCHD Lite throws a spanner in the works because many of the existing AVCHD editing packages are incapable of supporting it without an update to the software. At the time of writing none of Apple’s video editing applications such as iMovie, Final Cut Pro or Express support the AVCHD Lite format. Adobe’s Premiere and Premiere Elements applications also do not appear to support AVCHD Lite at this time.

The only solution for AVCHD Lite on Mac OS X at the moment is the one that saved many an early adopter like myself a couple of years or so ago when AVCHD cameras first came out – VoltaicHD by Shedworx. This is a $35 app that will convert your AVCHD Lite footage to the Apple Intermediate Codec format that can then be used in any of Apple’s video editing applications.

Some Handy Links / References…

Here’s a few links to some handy information about AVCHD Lite:

Update:

As of 04/06/09 iMovie now supports editing of AVCHD Lite files with the iMovie 8.0.3 update!

FlamingoHD 1.0 released

I wrote a review of FlamingoHD a couple of months ago of their new media management application for Mac OS X called FlamingoHD (made by Shedworx, the makers of VoltaicHD).

At the time of the review FlamingoHD was available for sale as a beta version (for those early adopters!), however, Shedworx have reached their first milestone and have now released version 1.0 of FlamingoHD to the world!

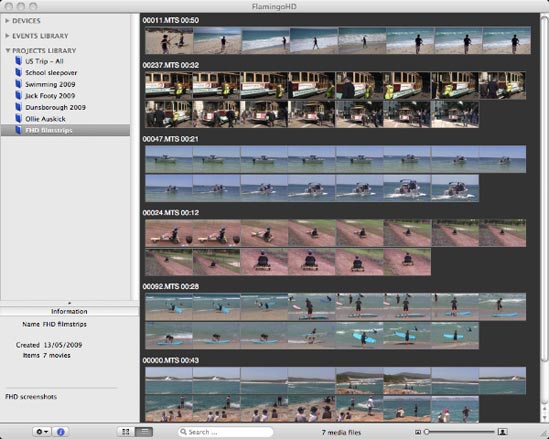
The main new feature in the final version 1.0 release is a new filmstrip view that lets you see keyframes from the video clips in your library. This is really handy and lets you see what scenes are within your various clips:

For a more detailed overview read my previous post: FlamingoHD – Helping you manage your AVCHD media or checkout the FlamingoHD page on the Shedworx website.

How to restore a MySQL database from your Time Machine backup

I’m writing this as much to remind myself as for anyone else really :) I generally run databases running on my MacBook which I use for sites in active development, I then transfer these databases over to a staging server which are then use by other people in the team and sometimes clients to input site content. Last week I imported content from the staging server and overwrote my local database thinking that the staging server was the most up to date, but as it turned out I was incorrect!

Fortunately I’m running Mac OS X’s Time Machine backup on my MacBook so I didn’t see a problem as I could just restore it from that. However, in reality it wasn’t quite as straight forward to do, so here’s what I had to do in the end to restore this database from my Time Machine backup.

Step 1: Find your local databases

Navigate to the location of your MySQL databases. For my MySQL install this is found at /usr/local/mysql but depending on how you’ve installed MySQL it might be elsewhere.

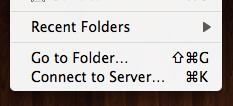
As you’ll probably see that’s not a location you can just regularly view in the Finder on Mac so you’ll need to use the ‘Go to Folder…’ option within the ‘Go’ menu in the Finder.

Once you’ve got to that location you’ll see the MySQL data folder which shows up with a red no-access symbol on it so you can’t actually navigate straight into it via the finder. Seeing as we can’t access the folder to restore a specific database we’ll just restore the whole folder from the Time Machine backup instead.

Image of MySQL's Data folder in the Finder

Step 2: Shutdown your MySQL server

It’s important that you shut down your MySQL server process before you continue. How you do this depends on how you’ve got MySQL installed. If you installed MySQL from the official installer for OS X downloaded from the MySQL website then you may have the a System Preference which you can use to stop it.

If you’ve installed MySQL another way such as self-compiled or via Mac Ports or you just want to use the Terminal then you can stop it from the Terminal instead. The following command can be used:

sudo mysqladmin shutdown

If you don’t have MySQL configured in your path in Terminal you may need to use the full path to the mysqladmin command:

sudo /usr/local/mysql/bin/mysqladmin shutdown

The path to those files may vary depending on how you’ve installed MySQL so if it doesn’t work then you’ll need to check the correct location. Note that I’ve also used ‘sudo’ in that command in case you need root privileges to stop the MySQL process. Check the MySQL documentation for your version of MySQL for further help.

Step 3: Rename your MySQL data folder via the Terminal

Image of file listing in OS X's Terminal applicationThe next step is to rename your MySQL data folder temporarily to avoid any clashes when restoring the data folder from the Time Machine backup. First you need to get into your MySQL directory:

cd /usr/local/mysql

You can then list all the files to check you’re in the right place:

ls -al

You should now see all the files including the ‘data’ directory where the databases are located. We can now use the following command to rename the data directory:

sudo mv data data-bak

Once that’s done you should see your directory happily renamed in both the Terminal and the Finder window.

Step 4: Enter Time Machine to restore your MySQL data directory

The next step is to enter Time Machine mode and restore the data directory from the backup. I’m sure you probably know how to enter Time Machine mode but make sure you enter whilst focused on the MySQL Finder window.

Image of restored files in Finder windowGo back in time a sufficient amount so that you’ll definitely be getting the version of the data that you want, highlight the data folder and click Restore. Because we renamed the data directory Time Machine will simply restore the data directory without any prompts. You should now see both the restored data directory and the renamed data-bak directory.
Step 5: Copy the database from the restored data directory

You can now copy the database from the restored data directory, this is done via the following Terminal command:

sudo cp -R data-bak/my_database_name data/my_database_name

The database is actually a directory containing other files so you need to use the ‘-R’ flag to recursively copy all of these across with the directory itself.

Step 6: Delete the restored data directory and rename the data-bak directory

Now that the database is restored and copied you can safely delete the restored data directory as it’s no longer needed at this point. Note: Be very careful using the ‘rm’ command! Bad things can happen if used incorrectly!

sudo rm -R data

You can then rename the data-bak directory back to it’s original name ‘data’, note that the ‘mv’ command doesn’t require the ‘-R’ flag:

sudo mv data-bak data

Step 7: Check file permissions / ownership

You may need to check the file permissions and ownership of the database that you have just restored to make sure that it will be accessible by MySQL when it is running. These may vary depending on your MySQL install method but they should be something like this:

drwx—— 60 _mysql wheel 2040 8 May 12:14 my_database_name

Basically the directory is owned by the user ‘_mysql’ and in the group ‘wheel’. If you need to change the owner then use the following command:

sudo chown -R _mysql data/my_database_name

Step 8: Start up MySQL

Once this has all been done, you can then start MySQL again using either the System Preference if you have it or via the Terminal command:

sudo mysqld_safe &

or with the full path:

sudo /usr/local/mysql/bin/mysqld_safe &

Step 9: There is no Step 9!

Hopefully you should now be able to access your newly restored database. As I said at the beginning, this is the method I used to restore a database myself recently, there may be other ways to do it but hopefully these steps might be of use to anyone else in the same situation.

Clipstart – Simple video file management and uploading for Mac OS X

Clipstart is a newly released application that is designed to complement Photo applications such as iPhoto or Picasa. It offers a streamlined interface that lets you import video footage from video cameras, tag them and then upload them to either Vimeo or Flickr.

Image of Clipstart application iconThat’s Clipstart’s features summed up in one paragraph but the application does what it does really well. There’s been a growing need for applications like these to manage the ever increasing amount of consumer video that many people have on their computers these days. iMovie is great for editing video and iPhoto can import video into it’s library but neither of them are up to the task of file managing the quantity of video files that users of digital video devices (e.g. Flip, Kodak Z series and mobile phones such as the Nokia N series etc) tend to produce.

Clipstart lets you manage all these files simply and easily and lets you upload either whole clips or only specific sections of clips directly to both Vimeo and Flickr. There’s currently no YouTube support though, I’m not sure if this is because Apple’s iPhoto already supports YouTube directly but I could see YouTube being another location that users would like to publish too so perhaps this will come in future versions. Update: I remembered that the upcoming Snow Leopard Mac OSX 10.6 also features an updated version of Quicktime Player which can upload straight to YouTube, perhaps this is one reason why Clipstart doesn’t include it?

You can find out more about it over at the Clipstart website where there is a screencast that takes you through the workflow and features as well as a demo version that you can use to try it out for yourself. It costs $29 for a single user licence.

Working with HD video on Mac OSX? FlamingoHD is another good option to check out…

If you’re working with HD video then you’ll want to check out FlamingoHD which is a similar application to Clipstart but is more specifically focused on HD workflow and in particular providing support for the AVCHD format of HD video used on many hard disk based cameras. FlamingoHD does also support all other video formats supported by Quicktime so video from Flip and Kodak Z series cameras can be imported as well as digital stills.

CSS Naked Day 2009

It’s that time of year again when many websites suddenly lose their inhibitions and let their inner-html run free!!!

Well, kind of, it’s CSS Naked Day 2009 so that’s why Suburbia is appearing the way it is for a 48 hour period (it’s an international ‘day’ so the site stays naked for 48 hours so that both east and west get to see the naked sites!).

What’s the point of it all?

The idea behind this event is to promote Web Standards. Plain and simple. This includes proper use of (x)html, semantic markup, a good hierarchy structure, and of course, a good ‘ol play on words. It’s time to show off your <body>.

Five Subversion Clients for Mac OSX

Until fairly recently if you were a Mac user and you wanted to use a version control system like Subversion you didn’t have much choice as far as client apps went. If you didn’t have the terminal skills to work via the command line and wanted use something with a nice GUI then you had to choose from apps that were either incomplete or not particularly Mac-like.

However, the latter half of 2008 brought a lot of change in regards to Subversion client apps for OSX. It’s kind of like with buses, if you wait long enough several of them come along at once ;)

Subversion clients from A (Adobe Dreamweaver) to Z (ZigVersion)

To give the various apps available thorough overviews is beyond the scope of this article, so I’m just going to list the various apps that are available and point out some of their features.

Adobe Dreamweaver CS4

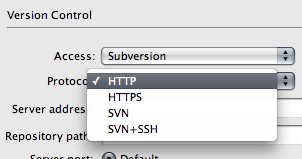
Dreamweaver CS4 added support for the Subversion version control system, something I’ve long thought would be a great feature and one which via an extension was available to Windows users. However, I don’t think the implementation of it in Dreamweaver CS4 is as good as it could be.

One issue in particular is that the commands for Checking out and committing to a repository are the same as those used for the regular Checkin / Checkout functions of Dreamweaver which I think is a bit confusing as they are very different features. Using these terms is a problem as they don’t match up with the correct terminology used in Subversion. Dreamweaver is often the first app (rightly or wrongly) that people who are learning how to make websites use so there’s a bit of a responsibility for it to teach people correctly and to encourage good habits.
I consider Dreamweaver CS4’s SVN integration to be a good first step but it could do with improvement to make it more usable. Unless you use Dreamweaver already then you’re probably not going to start doing so just to get access to its Subversion integration. But if you’re already a Dreamweaver user then it does offer some useful functionality, and if you’re a DW user but have never used version control then it’s a good enough place to start!

Dreamweaver CS4 costs $399 for a commercial licence but there are also educational licences and there is also a 30 day trial.

Go to the Dreamweaver CS4 website

ZigVersion

When I first started using Subversion ZigVersion was the best solution for OSX that I tried. It was the most user friendly / easy to use out of all the clients available at the time such as SVNX, Syncro SVN and SCPlugin. I’ve always used a hosted Subversion repository ever since I started using Subversion so I was needing an application that would allow me to easily connect to an external server. ZigVersion made it pretty easy to do that, and to an SVN noob it was fairly easy to understand what was going on.

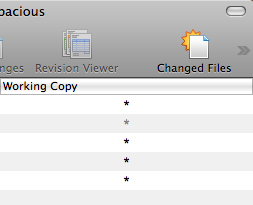
Once connecting to my SVN repository it was quite easy to create a working copy and update it from the repository files. After working on files it was easy to find the updated files with a simple click on the ‘Changed Files’ icon in the menubar. Only the new or updated files would be shown which could then be selected and checked in to the repository with appropriate comments added at the same time. It was also easy to get access to revisions of files via the ‘Revision Viewer’ button.
It’s a pretty straight forward application and does the job, one criticism would be that the interface is fairly unexciting in appearance. I mainly say that as this is a review of Mac OSX Subversion GUI apps so the visual appearance is important and the main reason why I’m not including SVNX or Syncro SVN amongst these applications.

ZigVersion costs $99 for a commercial licence but is free for non-commercial use. There is also a 30 day trial period.

Go to the ZigVersion website (Zigversion no longer appears to be available)

Versions

We’re now getting into the mac-daddy territory of Mac OSX Subversion apps. Versions was the first of the new wave of Mac SVN apps, despite showing as "coming soon" for over a year and feared by many to be vapourware.

However, although it was delayed the app was launched and it delivered on its promise of providing a much more Mac-like app for dealing with Subversion repositories and the tasks involved with working with them.

Versions’ main tool bar provides buttons for Update, Commit, Checkout and other options, just under the main toolbar there are three tabs, Timeline, Browse and Transcript. The Timeline tab gives you a timeline in the form of a list of revisions and accompanying notes which makes it easy to view the changes made over a period of time. The Browse tab allows you to view the repository files and view history of individual files as well as comparing, managing blame and also a Quick Look option for quickly viewing the contents of files.

There is a quick setup button that will get you setup with an account at Beanstalkapp.com who provide online SVN repository hosting, there’s a free account offering one repository to get you started with various tiered pricing options after that.

Versions deserves credit for really raising the bar for Mac SVN apps, the teaser page had me longing for months for them to launch the app! Although in the end I had give up waiting and buy ZigVersion instead in order to get some kind of GUI access to my repository.

Versions costs €39 (approx $50) for single user licence, there is a 21 day trial period.

Go to the Versions website

Cornerstone

This is the Subversion app I’ve been using the most out of all of them recently, although it’s a pretty close race between it and Versions. Cornerstones’ interface is well thought out and well designed and by that I don’t mean just good looks but that it provides a great feature set for working with multiple SVN repositories.

You can easily filter the working copy files in different states such as Changed, Modified, Conflicted, Unversioned and Locked. The ability to filter files this way is an essential feature in an SVN app, finding changed files in order to commit them to the repository is one of the most things I do.

Cornerstone also offers a great horizontal timeline view that displays the various revisions which is great for quickly reviewing the details of each revision such as dates, times, Revision notes and changes made.

Cornerstone costs $59 for a single user licence but you can use a trial version for 14 days to check it out.

Go to the Cornerstone website / → Buy Cornerstone from the Mac App Store

Coda

Coda is a text-editor for web development, its main strength being the integration of several aspects of the common web development workflow: text editor, FTP, CSS editing and Terminal. In a recent update the application now has integrated Subversion support which adds it to this growing list of OSX Subversion clients.

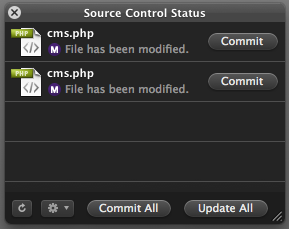
Coda’s SVN integration adds a simple source control status window that quickly highlights changed files making it easy to find updated files and commit them to the repository. There is also easy access to a Source Control menu option offering committing / discarding changes, refreshing, comparing and updating the repository.

It is smoothly integrated into the workflow of Coda and rounds out the feature set of the application and it’s aim to provide a one-window web development environment.

Coda costs $99 for single user licence, there’s a 30 day trial period.

Go to the Coda website

Closing – Rise of Git

Ironically as all of these Subversion apps start to appear many people are starting to switch to using Git instead of SVN! There are a couple of Mac GUI apps for Git available so far such as GitX and Gitnub so check them out if Git is more your thing.

Update: Couple of new Subversion / Git apps on the Mac App Store

If you’re using Beanstalk for Subversion / Git hosting you might want to check out the app Magic Bean for Mac too. There’s also an app called SourceTree which supports Git and Mercurial and also has some support for Subversion. I haven’t tried either app yet but worth a look I think.

FlamingoHD – Helping you manage your AVCHD media

FlamingoHD is a new application by Shedworx (the guys that make VoltaicHD), with the purpose of helping you manage all of your AVCHD video footage. Although AVCHD has greater than ever support these days it still presents a challenge when it comes to managing all of the video that you’ve shot, especially as the convenience of shooting straight to disk or card kind of encourages you to record a lot more than you would when using tape!

FlamingoHD provides a solution to this problem by enabling direct import from your AVCHD camera or alternatively importing AVCHD clips that are already on your hard disk. It does this by providing a preview thumbnail of the video footage before you import it, this saves a lot of time compared to iMovie or Final Cut Pro as you can choose only the clips you want without having to convert the footage first.

The user interface is easy to understand as it features a left hand menu very similar to iPhoto or iTunes which contains sections for Devices, Events and Projects, very similar to the iLife applications.

Importing AVCHD footage into FlamingoHD:

The basic process is to select the source of your video footage. You can either connect your camera to your computer which will automatically show up in FlamingoHD as a device, or you can select ‘Import Media’ from the File menu to select either a single clip or a folder containing clips from a location on your hard disk, once selected they will show as a device in the ‘Devices’ section in the left hand menu. It’s also worth clarifying that FlamingoHD will actually import video, audio and images from your source device or location and can manage all of these assets within Events and Projects.

Setting Preferences and Creating Events:

With a device selected ready for import you can then choose which clips you want to import into FlamingoHD, the imported files will automatically become an Event, or more than one Event if there are multiple clips shot on more than one day. This can be controlled by a preference which allows you to switch off this feature if you just want to import everything into one event.

The application preferences are worth checking out as there are a couple of other important preferences to consider. The first is ‘Hide media already imported’ which is enabled by default, this is useful when there are a lot of clips on a camera that you have already imported as it hides the ones you’ve already brought in.

The second important preference is ‘Copy imported media to Library area’, it’s important to set this appropriately because if it is ticked any clips imported from a folder on your computer will be copied to FlamingoHD’s Library which will take up more space and will result in duplicate files. Clips imported directly from a camera will be copied to the library regardless of this setting, the location of the Library for FlamingoHD can be set in the Base Location preference under the General tab.

Creating Projects:

Once you’ve imported clips into FlamingoHD you can then group clips together into Projects, these projects can then be sent to exported in via several methods, either ready for editing or as final output.

Projects are created by selecting ‘New Project…’ from the File menu, this adds an entry under the Projects section of the left hand menu which you can name to suit. Once the Project has been created you can drag and drop clips from any of the events that you previously created.

Exporting / Converting Projects:

After creating a project you can then choose to export or convert your files. FlamingoHD has options to send files to VoltaicHD, RevolverHD, iMovie and also to the assets folder of other editing applications such as Final Cut Express or Final Cut Pro.

You can export by either right-clicking on the Project name or by selecting the Project and clicking on the ‘Media’ option from the main menu. The four options at the bottom of the menu allow you several choices for your project:

Send to VoltaicHD
This option will send your footage to VoltaicHD and it will be queued up and converted ready for use in whatever application you want.

Send to RevolverHD
Selecting this option will send your AVCHD files to RevolverHD where they can be burned as either AVCHD DVD or Blu-ray DVDs that can be played back on Blu-ray players such as the Playstation 3.

Send to iMovie…
This option is specifically for sending your project to iMovie, it creates a new project in iMovie and sends your clips to VoltaicHD for conversion, once converted you can open iMovie and all of the clips will be there in the new project.

Send to Editor…
Using this option will send files to a folder in the assets location of your preferred editing software, you can set this option in the Preferences of FlamingoHD. The AVCHD clips will be converted in VoltaicHD and copied to the folder. You can then open your editing software and bring in the files that are ready for editing.

In Beta and available now!

FlamingoHD has worked pretty well for me so far but it is worth pointing out that (at the time of writing) that it is a 0.1 version, as such it’s beta software and still being actively developed. However, the developers Shedworx have made it available to purchase now for the reduced price of $29.99 while it is in beta, the price will increase after the beta period.

FlamingoHD already provides a very useful application for managing all of your AVCHD media, but one aspect I haven’t mentioned is that it will also handle any video format that is supported by Quicktime so it can also be used for cameras that don’t use AVCHD as the video format. For me this is the key to the application’s potential, it fulfils a function that Apple’s own iLife suite doesn’t provide, that of being a specific video asset management tool.

The only criticism I can see is that it currently doesn’t provide direct playback of the video clips that are imported into it, instead the files are opened into Quicktime player. The biggest drawback of this being that Quicktime player doesn’t currently support AVCHD clips. However, Apple’s next release of Mac OS X, 10.6 ‘Snow Leopard’, is supposed to support AVCHD so that will be one solution, but in the meantime perhaps enabling AVCHD clips to open in the open source VLC player could be integrated as this already provides playback of AVCHD footage. The next release version 0.2 will provide a film-strip view of clips which will at least make it easier to examine the clips in more detail without needing to open them.

Give it a try for yourself, there’s a demo version that is limited to a maximum of 2 events, 2 projects and 50 clips, this gives you enough to try it out and kick the tyres. There are also demo versions of VoltaicHD and RevolverHD so you can test out the whole workflow. Finally, don’t forget to give feedback to the developers via the FlamingoHD contact form, they’re keen to consider people’s ideas and to hear about any issues people encounter with the software.

Atlas by 280North

280North’s Atlas looks pretty amazing, a tool to create web applications (Rich Internet Apps) but not based on Flash / Flex but on the core HTML, CSS, Javascript capabilities of modern web browsers.

Built on the open source Cappuccino web framework which has the advantage of abstracting away all the browser quirks etc and just allowing you to focus on creating really powerful web applications.

It uses a programming language called Objective-J which is built on top of Javascript and modelled on Apple’s Objective-C language used in Mac OS X and iPhone OS applications.

Check out the videos below for demos of it in action.

Introduction to Atlas from 280atlas.com:

Demo of Atlas at Future of Web Apps Miami 2009:

Quick Review: eduStyle.net / The eduStyle Guide to Usable Higher-Ed Homepage Design

If you’re involved in web design and development for Higher Education then you may already be aware of the great website eduStyle which showcases examples of website design from Higher Ed institutions from around the world with the aim to provide a place for “web professionals to learn from and be inspired by work of their peers“.

The main feature of the site is a gallery where you can browse through various sites. Each site has a screenshot of the website and you can then click through to a detail page showing a large image and of course the URL of the site. It also allows you to vote for the site as to whether it’s ‘My Style‘ or ‘Not My Style‘. eduStyle also run the annual Higher-ed Web Awards so if you see a site you like you can also nominate the site for an award via link on the detail page. There’s also a blog with regularly updated articles and info about events etc.

Review of “The eduStyle Guide to Usable Higher-Ed Homepage Design”

Ok, slightly odd to call this a review when I haven’t even read the book yet! However, eduStyle have published a book titled “The eduStyle Guide to Usable Higher-Ed Homepage Design”, given that the website is such a good resource then it’s certain that the book will be very useful too. It’s been released as a PDF version initially and will be published in print in due course for those, like myself, that like the feel of real paper! The book has some interesting goals:

  • Get External Validation of Your Design Ideas
  • Learn Best Practices and Common Pitfalls of Higher Ed Homepage Design
  • Get Tips To Improve the Usability of Your Homepage
  • Find Out Leading Edge Design Trends
  • Discover Common Themes Between Noteworthy Winners
  • Understand the Reasoning Behind Your Competitor’s Designs
  • Learn Secrets That Can Get Your Homepage Noteworthy Status

Anyway, that’s enough rambling about a book I haven’t read, you can go to the eduStyle site to read more about it yourself!

~Rick